
Wired Kit Instructions
NOTICE: This modification involves disassembly and internal hardware changes to your Kensington SlimBlade Pro trackball. Use proper care when working inside the device.
Performing this modification will void Kensington's manufacturer warranty on the original device. By performing the modification described in this guide, you assume all risk. Icebound Flame LLC is not responsible for any damage to your device, components, connected equipment, or for any injury to persons resulting from the modification.
Step by step
You'll need:
- Kensington SlimBlade Pro
- Small screwdriver (Phillips #1)
Also recommended:
- Plastic pry tool
- Tray for screws
- Clear tape
- 1
Open the case
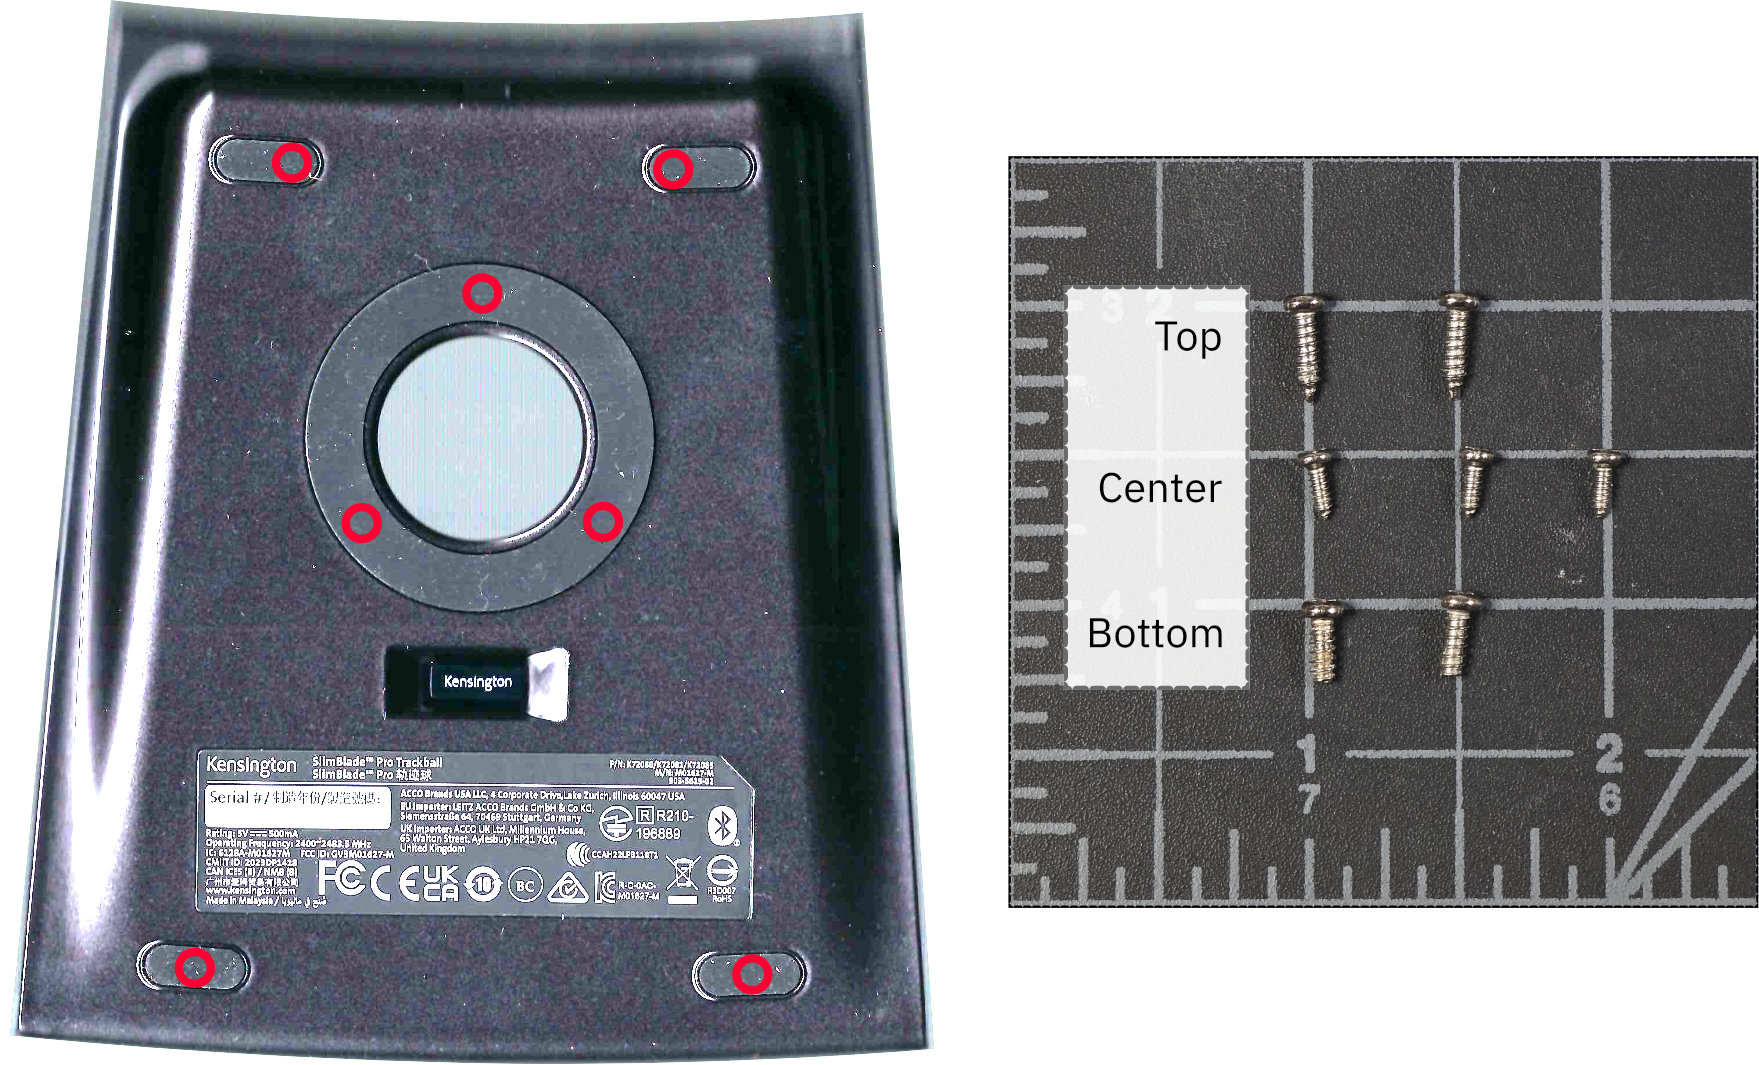
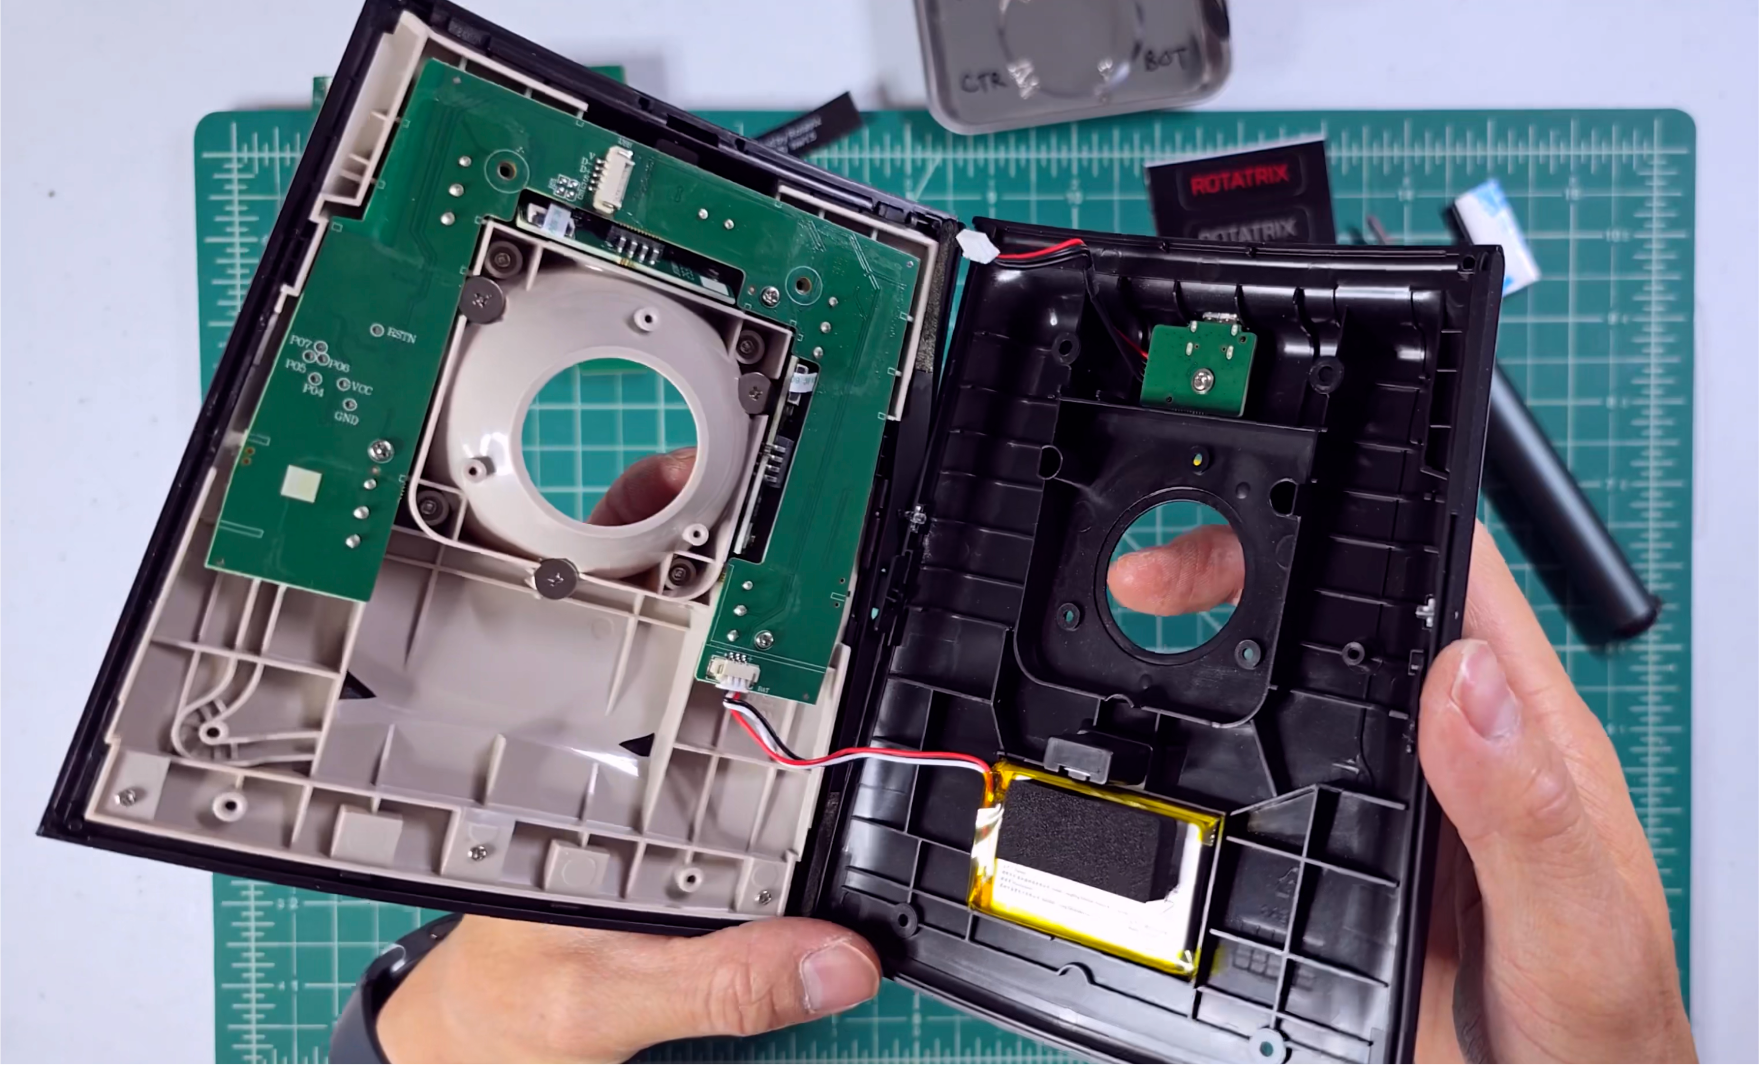
Pry off the rubber pads on the bottom and remove the screws underneath.
Pry the shell halves apart starting from the bottom of the shell, under the screw holes. A plastic pry tool is recommended to avoid damage.
The two side rubber pieces are held on with small strips of adhesive that will detach with some prying. Keep them with the bottom shell — the switch actuators and LED light guides sit inside.
Disconnect the two wire-to-board connectors — the USB connector and the battery. You can carefully tug on the wires as a bundle to avoid picking at the connectors themselves.
Before closing the case back up — whether you've done the mod or kept the stock board — see step 6. The slide switch on the left side is extremely fragile and must be aligned before closing. - 2
Coil the battery cable out of the way
Leave the battery in place, disconnected. While the kit is installed the battery isn't charged or connected to anything.
Coil the battery lead and tuck it down in the area between the ribs immediately to the left of the battery so it stays clear of the board.
The battery stays disconnected. Since it won't be charged, after a very long time it may become too deeply discharged to use. Keep it in place — the battery and the foam spacer on top of it support the palm rest so the buttons don't stick when your palm is resting on the device. If you ever do remove the battery, dispose of it according to your local regulations and not in your household trash. Never charge a cell that's puffy or damaged — damaged or punctured li-ion batteries can vent, ignite, or explode. - 3
Remove the stock board
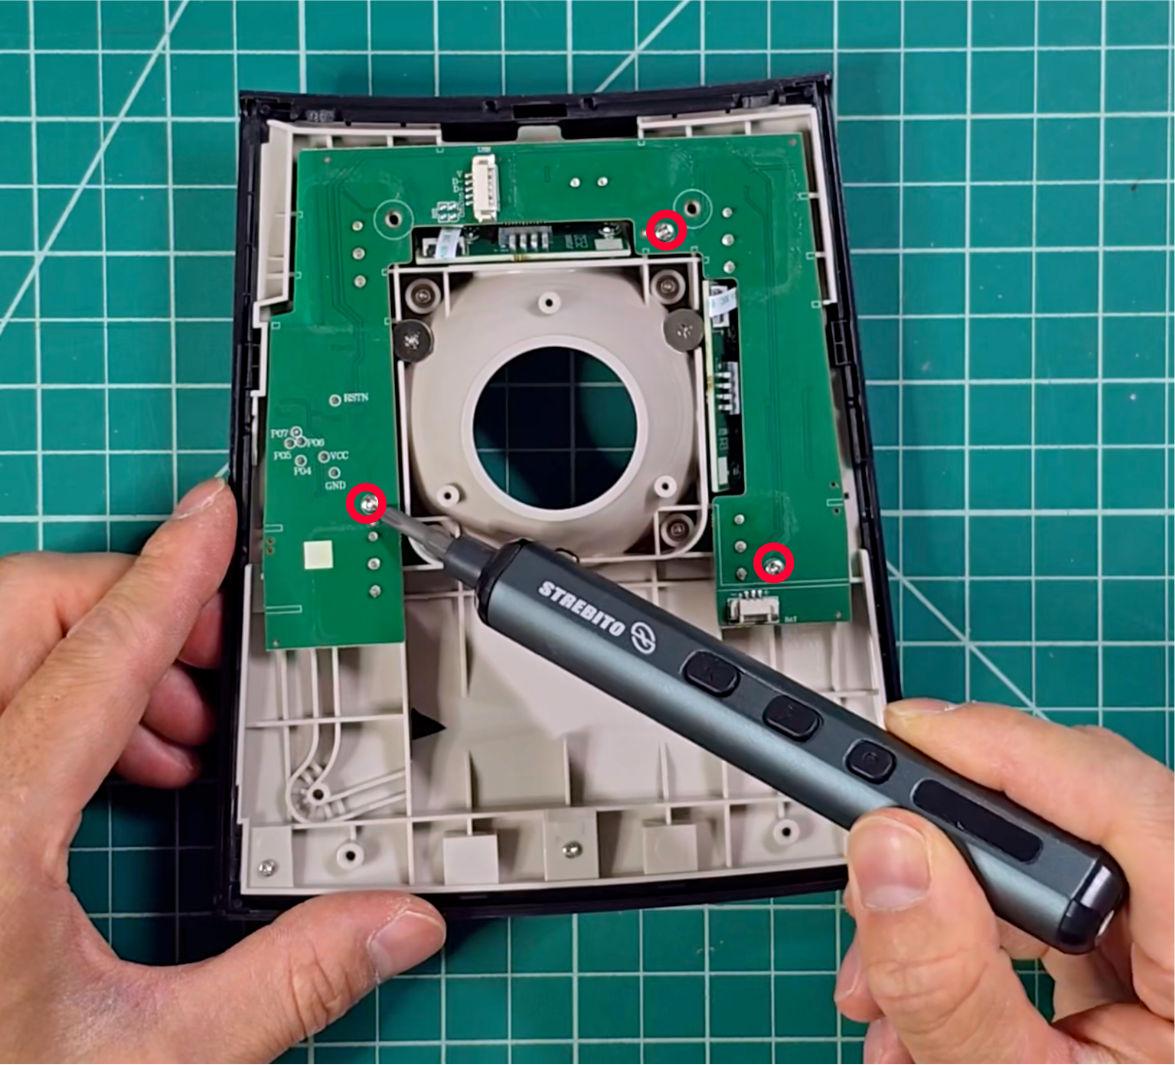
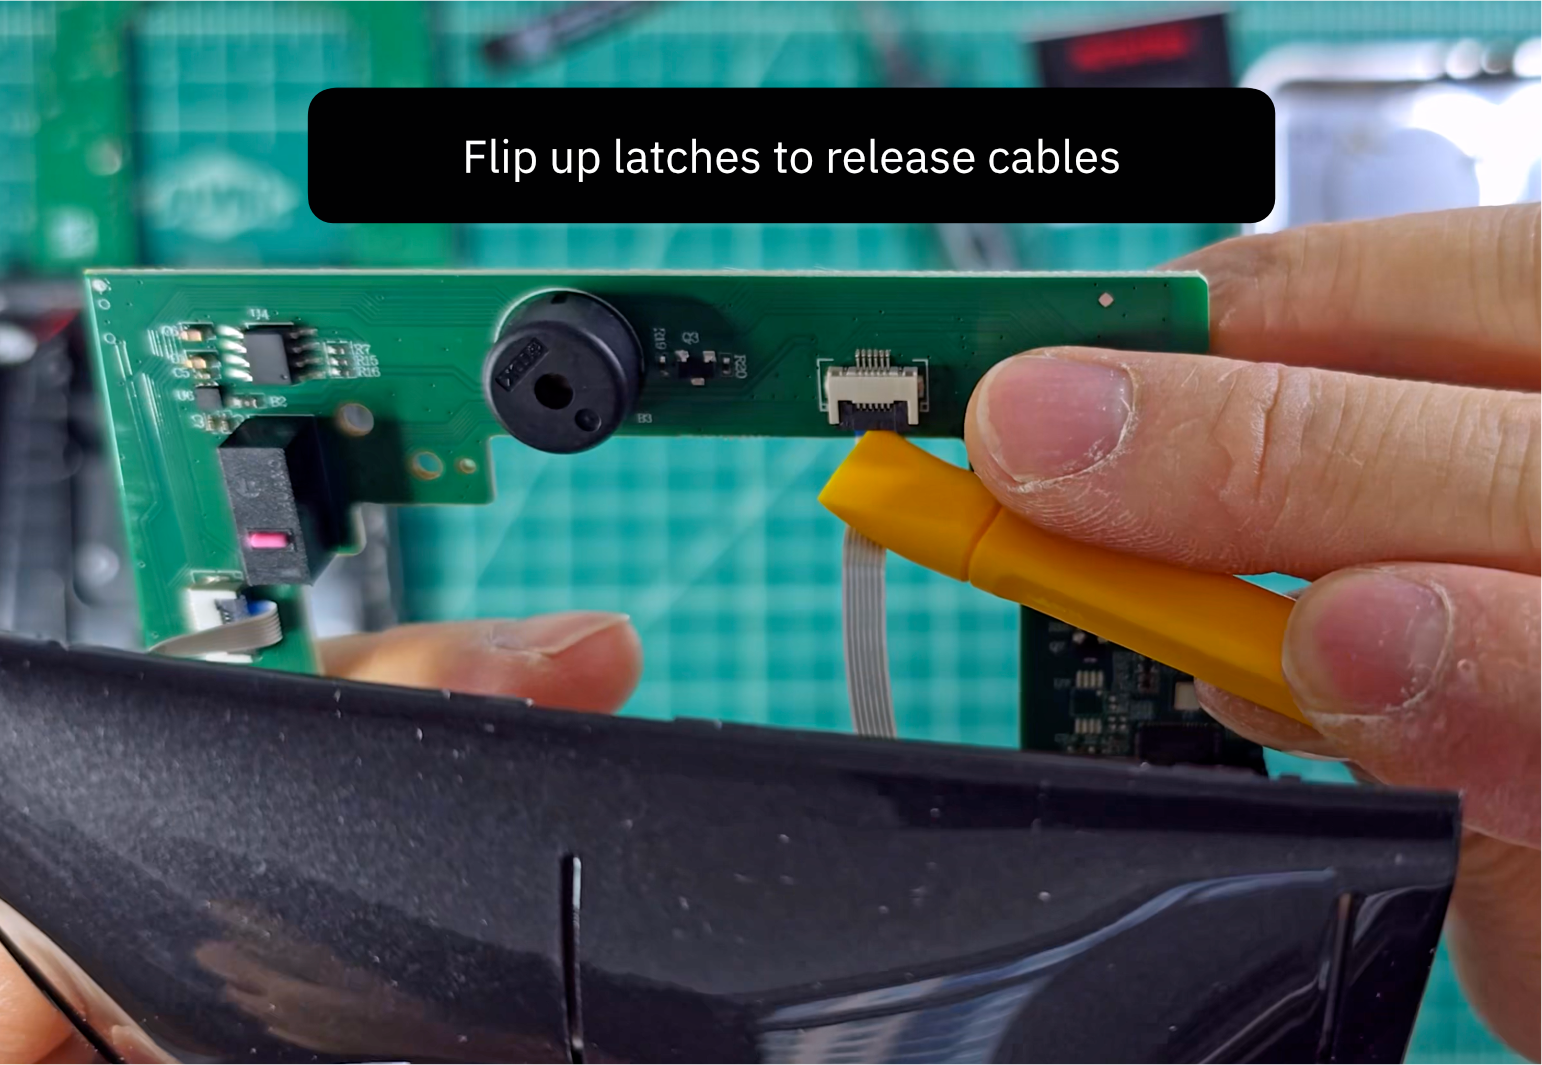
Remove the screws holding the original Kensington controller board and lift it up out of the case.
The flat flex (FFC) ribbon cables connect to the back of the board, so lift it out only partway. With the board halfway out, flip up the black latch on each connector to release the ribbons — they should come out on their own or with minimal force. The board then lifts free.
- 4
Optional — transfer the LED baffles
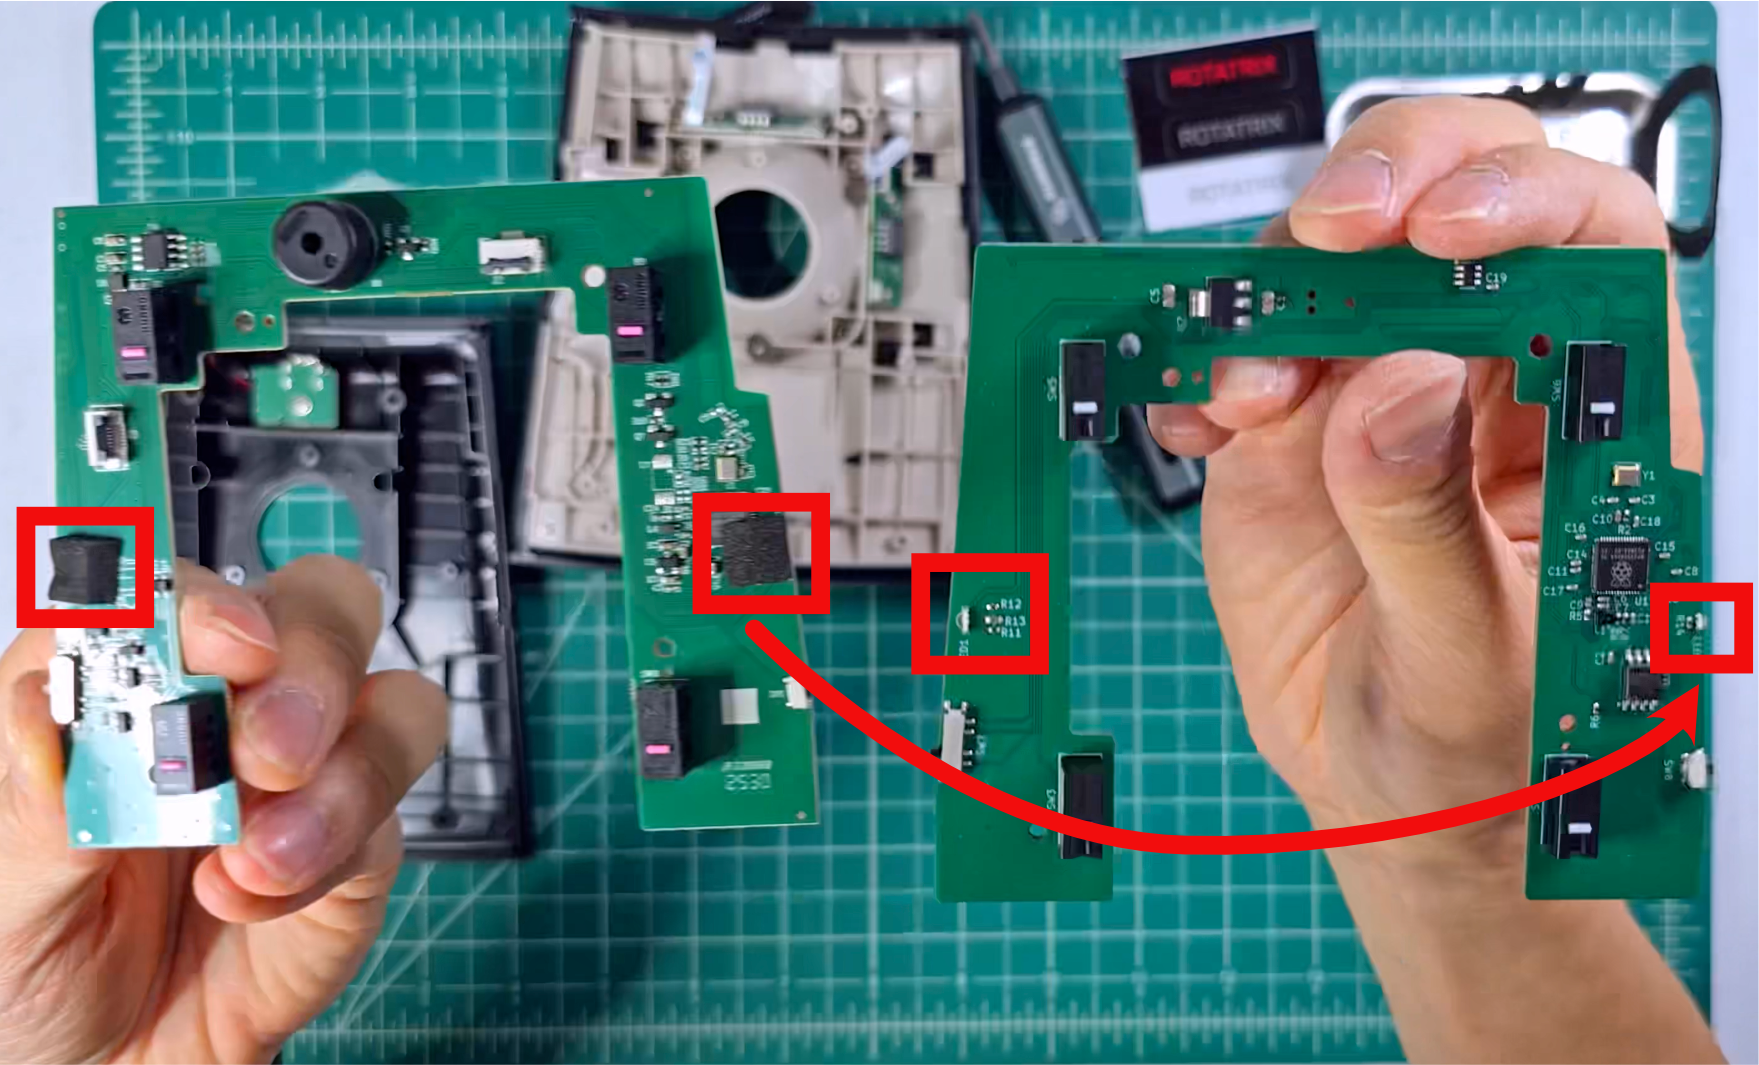
Peel the adhesive foam baffles off the original board and stick them onto the corresponding LEDs on the new board. They keep stray light from the indicator LEDs from shining through the top of the device.
- 5
Install the Rotatrix board
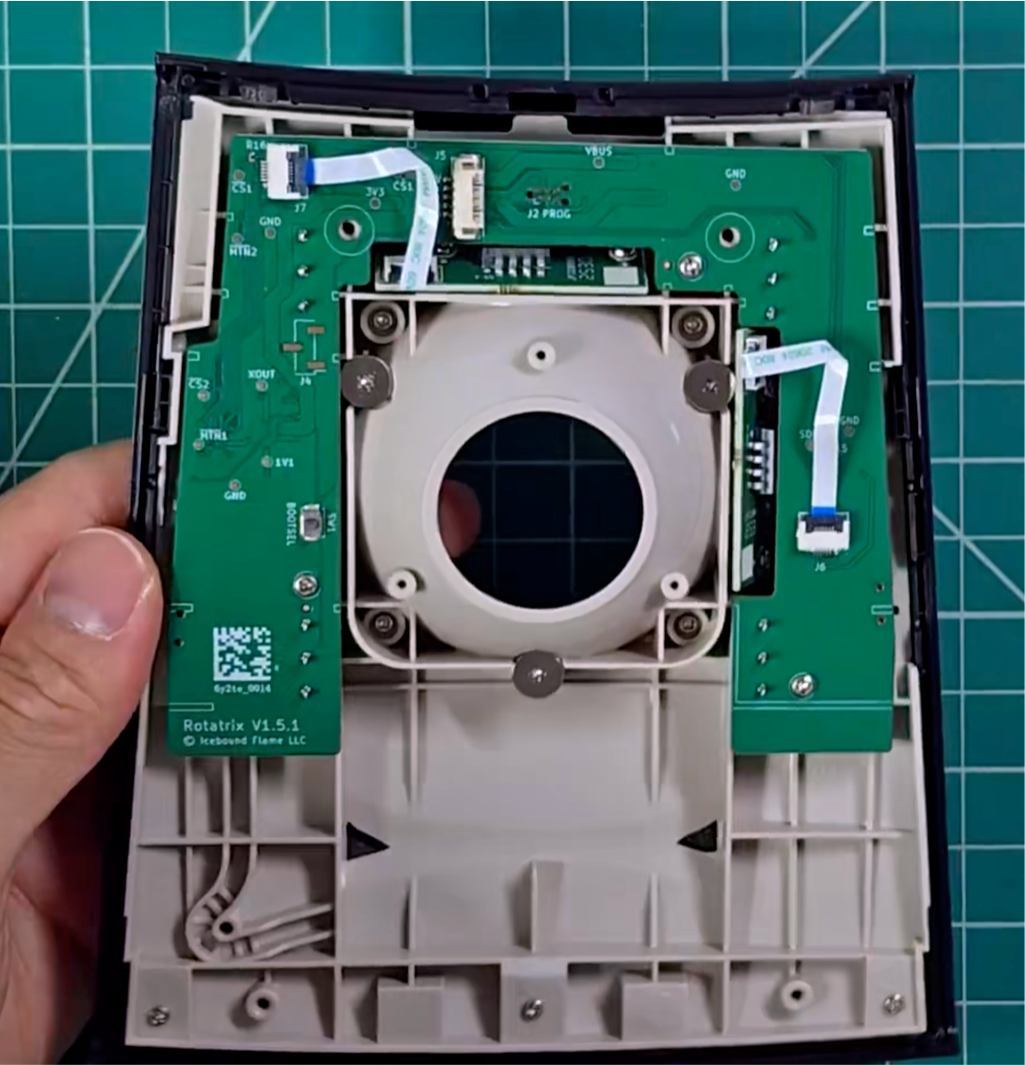
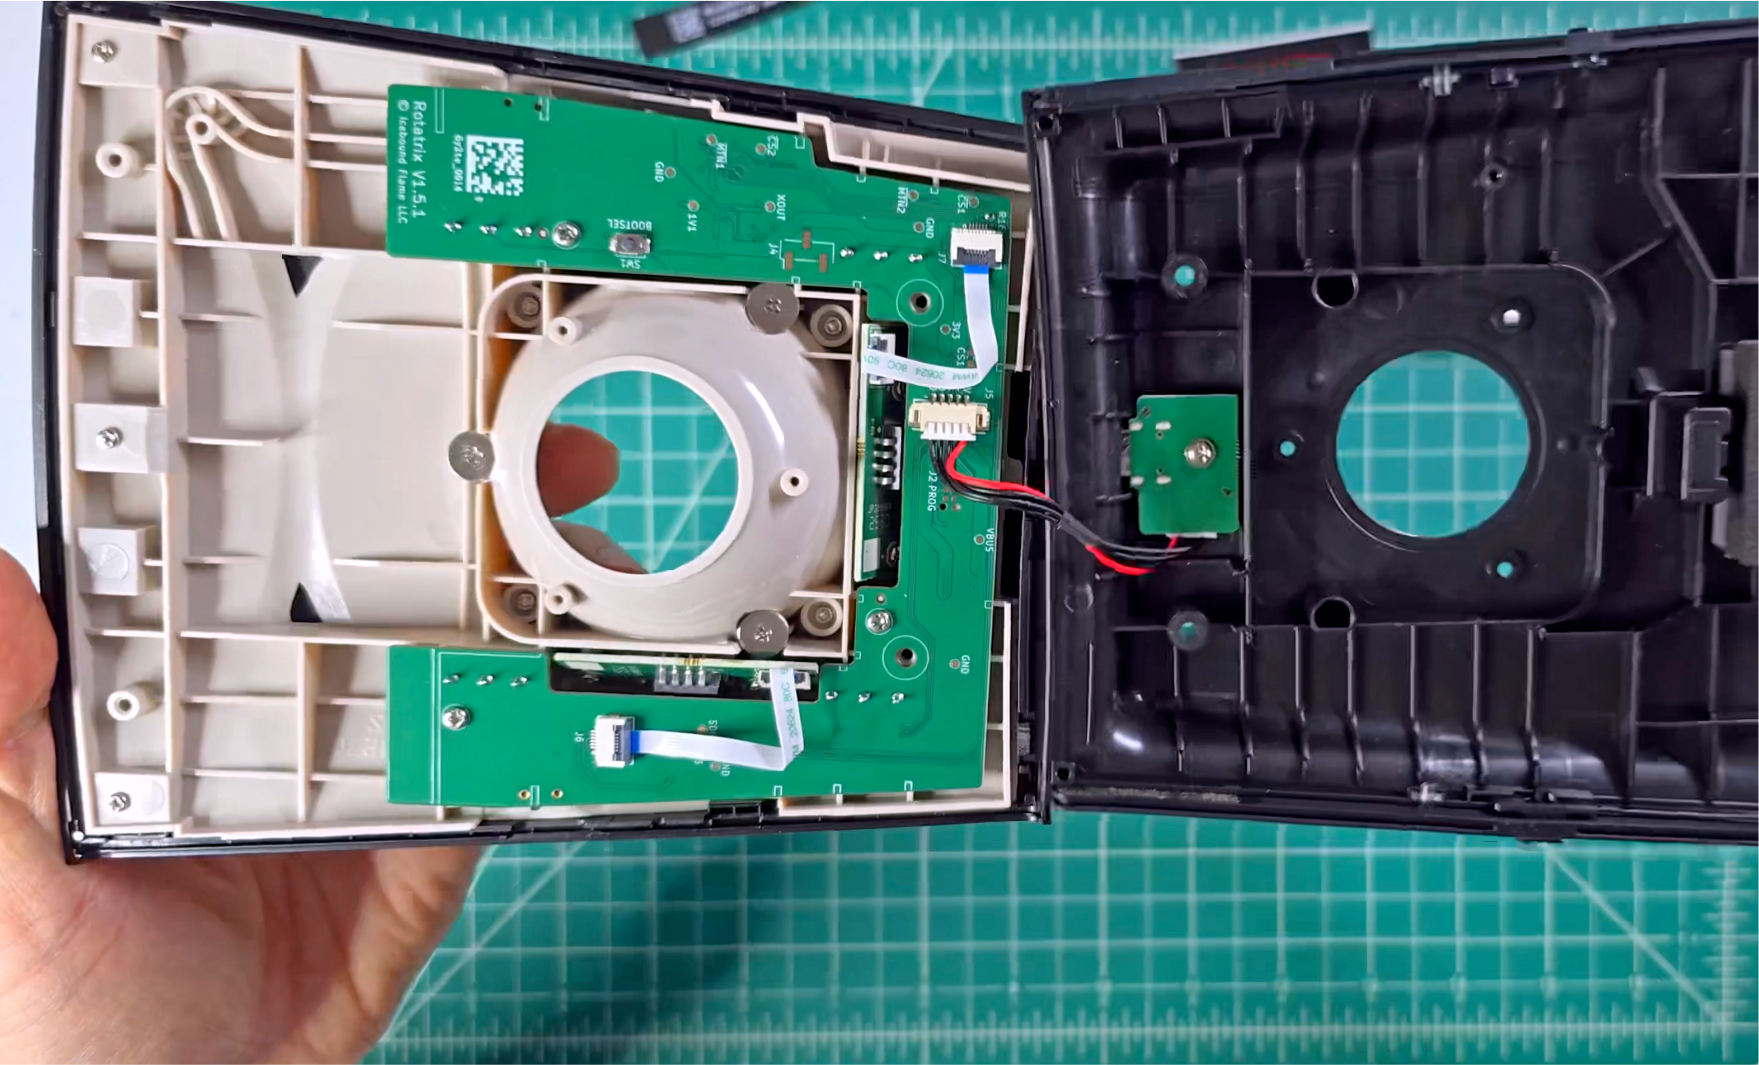
Seat the Rotatrix Wired board in the same footprint, lining it up with the original screw posts, and reinstall the screws to hold it in place.
Once the board is installed, reconnect the cables: flip up the black latch on each connector, slide each FFC ribbon fully in, and close the latch. Then reconnect the USB-port connector.
- 6
Close the case
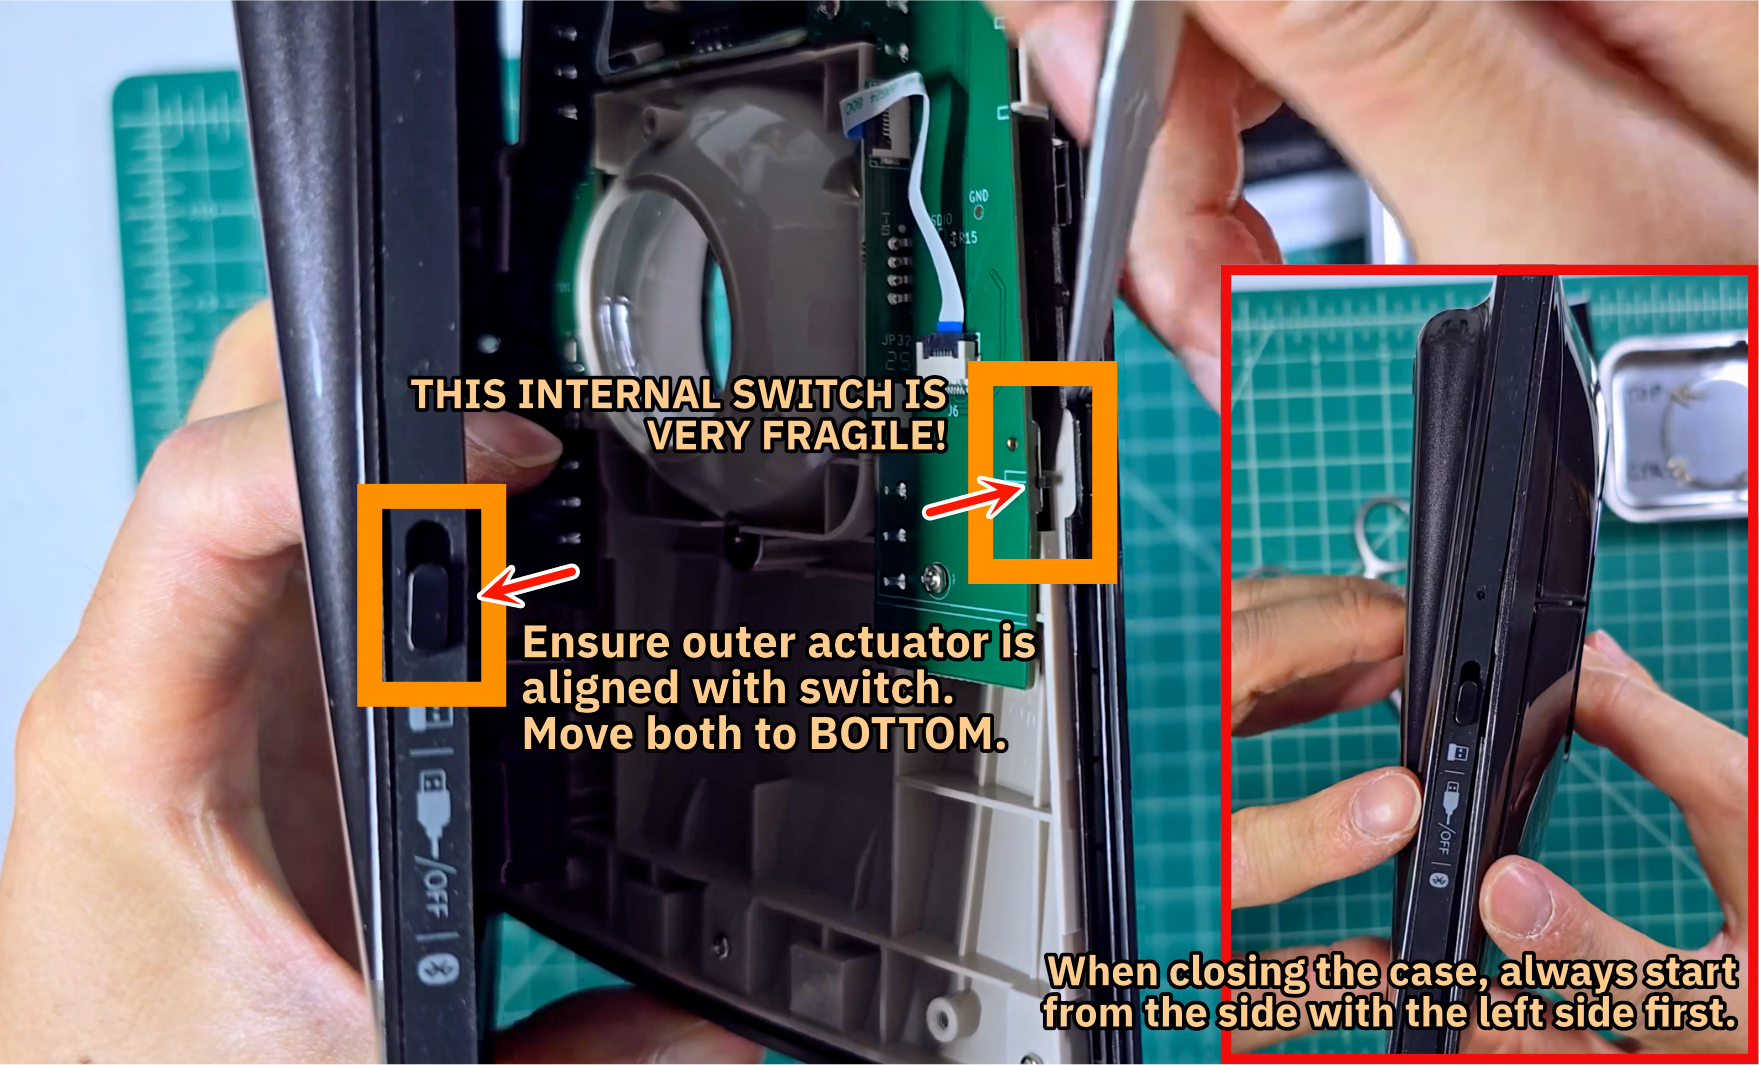
Bring the two halves back together gently — this is the most fragile part of the job.
Watch out for the 3-way side switch — it's very fragile and has to be aligned and seated in the actuator in the plastic housing. If the switch actuator has fallen out of the rubber, make sure its "U" channel faces up so it can accept the switch arm.
Close from the left side first, lining the power-switch actuator up with the switch on the PCB.
If the halves won't close, check whether the USB wires or any of the ribbon cables are getting in the way. Try twisting them one way or the other so they hold position better.
When it's closed correctly the case mates flush and won't pop back apart on its own.
Once everything is aligned and the case sits flush, reinstall the case screws.
- 7
Connect & test
Plug the trackball into your computer over USB-C and confirm everything works — the ball, every button, scrolling, and the side switch — before final reassembly. You'll need the Rotatrix app to check the inputs, so install it now if you haven't already.
- 8
Finish up & apply the decal
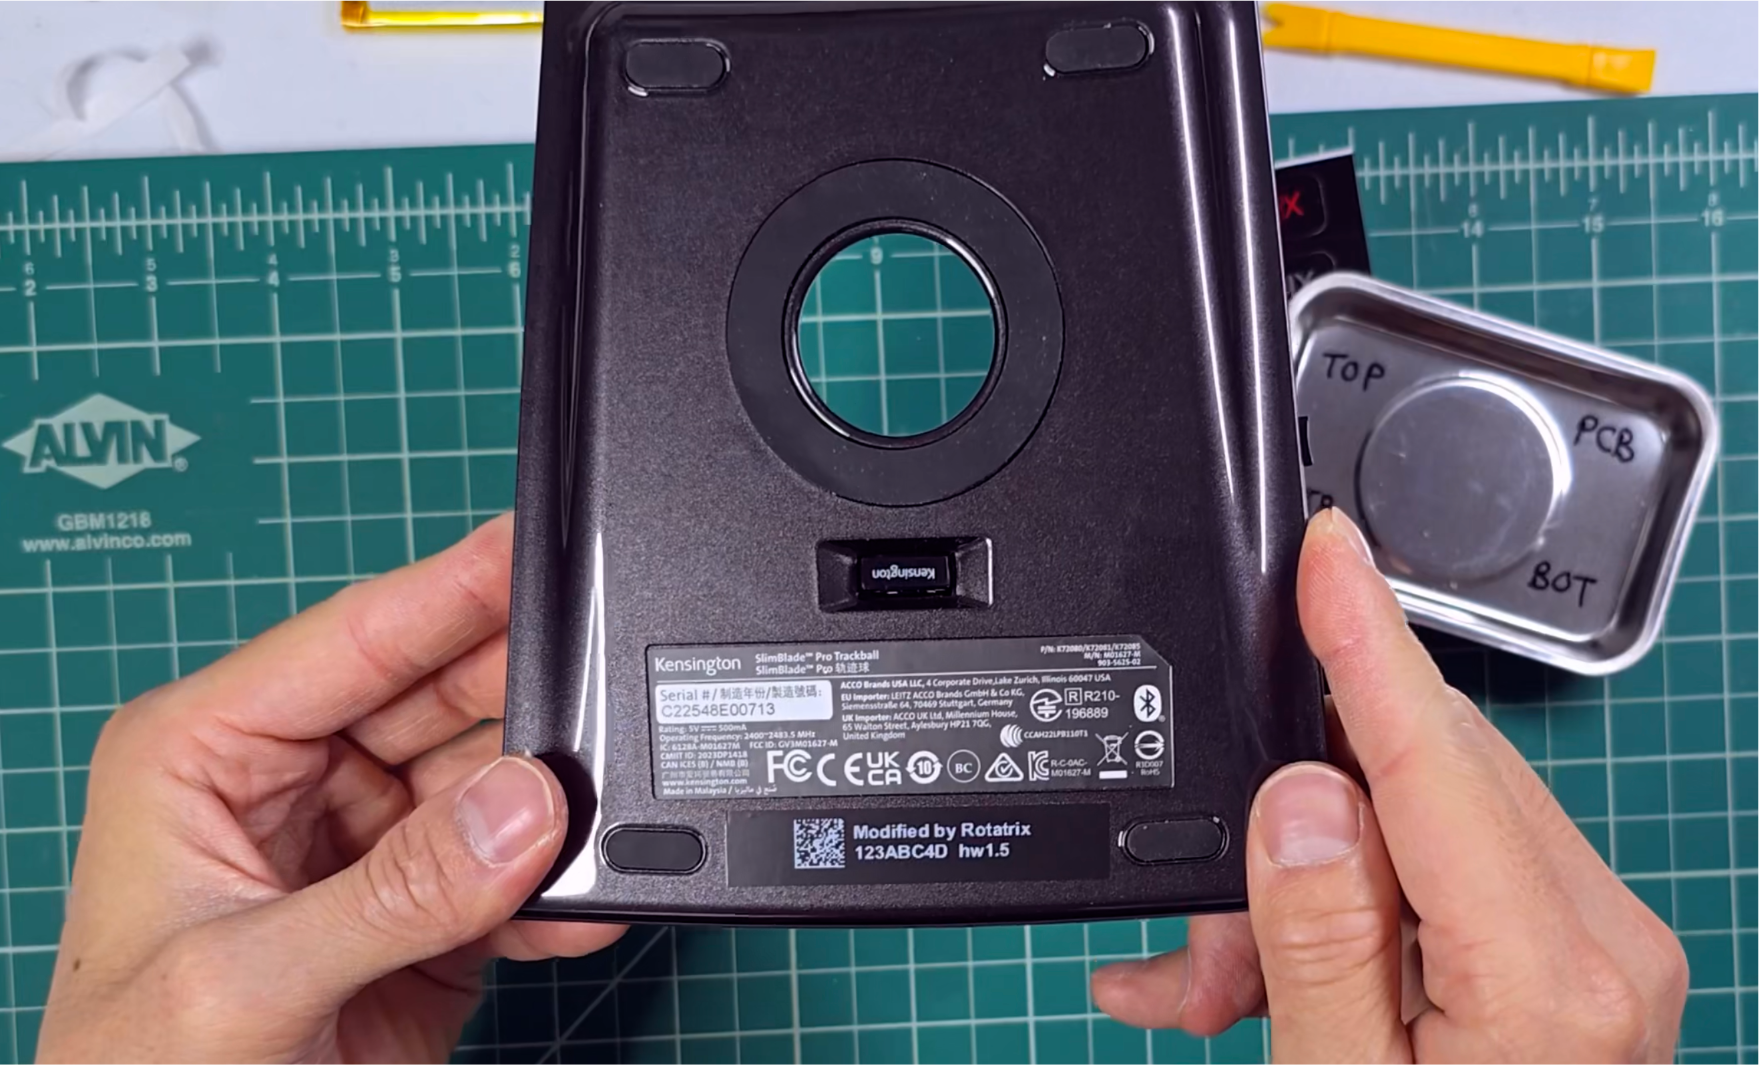
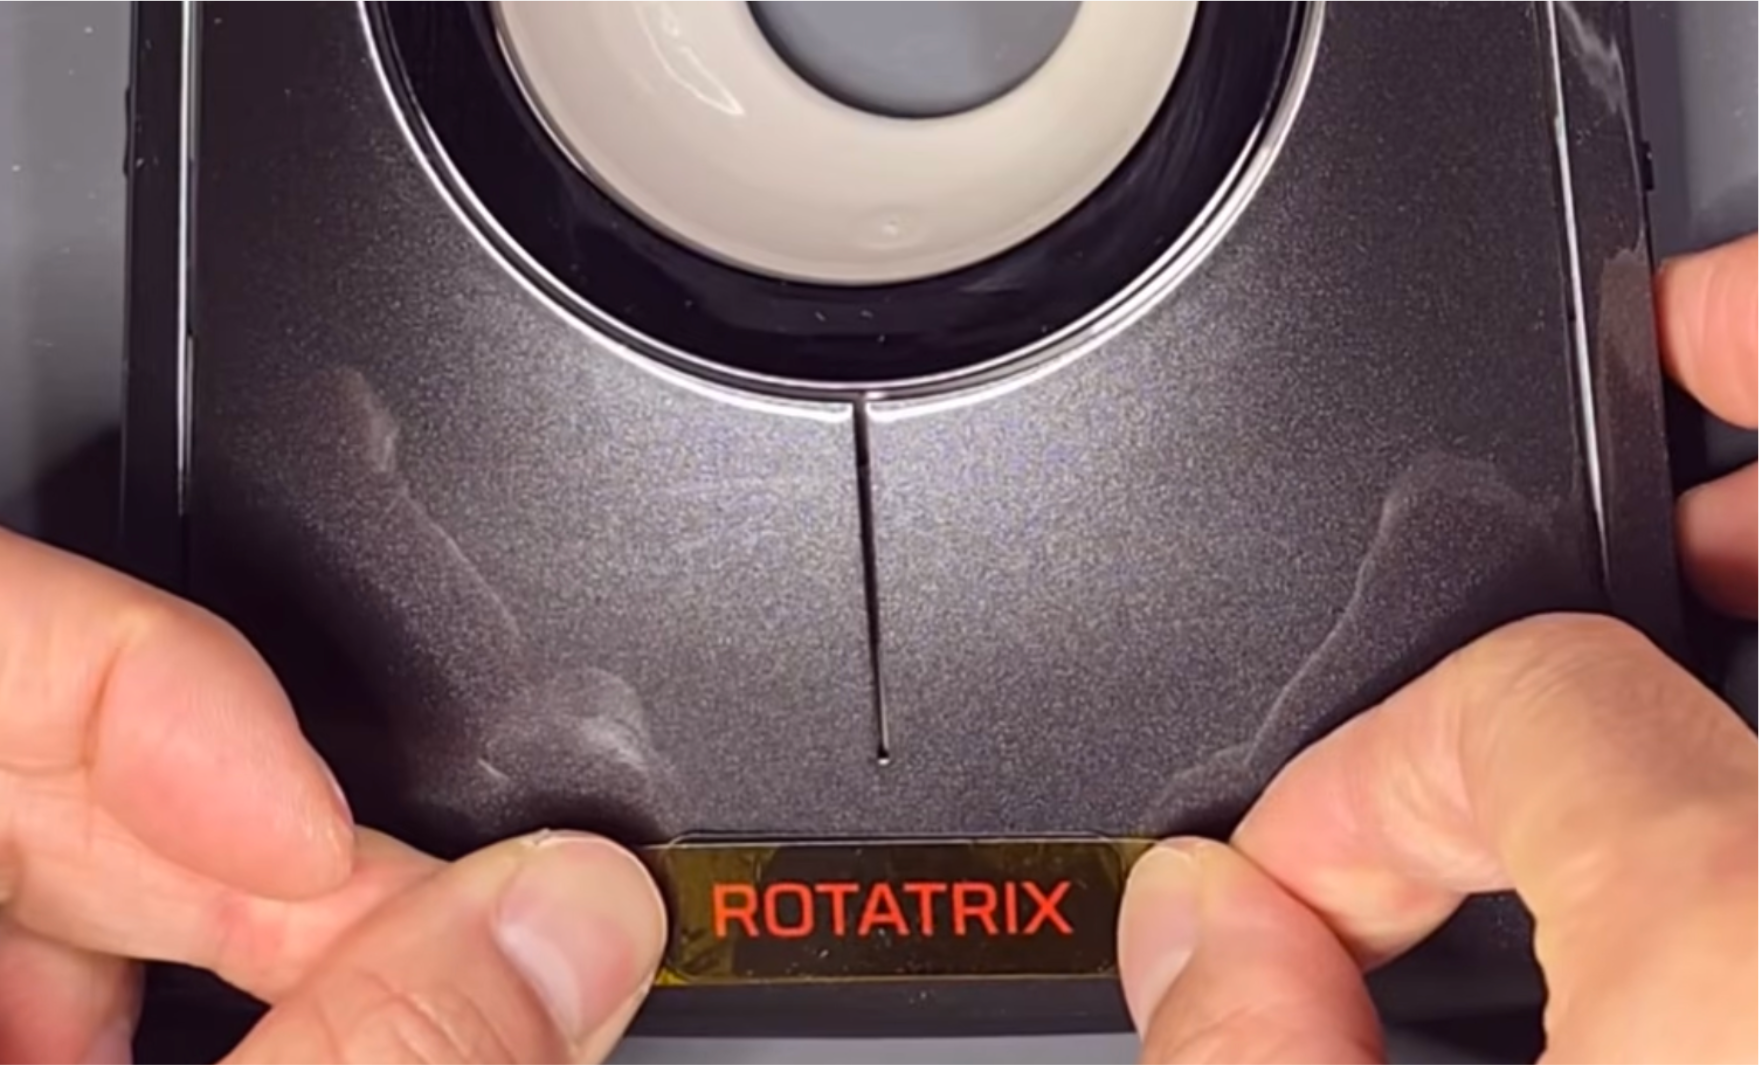
Replace the case screws and the rubber feet.
Apply the provided serial label on the bottom of the device, centered under the existing device label.
Apply the Rotatrix decal on the palm rest, over the Kensington logo. It comes in three colors — pick the one that matches your trackball. Use a strip of clear tape as a carrier to center and align the decal before pressing it down.
That's it — your trackball is assembled and ready to use.
Support
Email david@rotatrix.com or join the Rotatrix Discord if anything comes up during the install.